
A Thermos flask keeps your tea hot all day because the vacuum it creates stops heat conduction. By achieving airtightness, you can do the same for your house. Imagine what your heating bills would be like if you lived inside a Thermos.
Part-L energy regulations stipulate how airtight new houses must be. In June (2022) the leakiest they could be reduced from 10 to 8 m3/(h·m2)@50Pa. In English, that means a new house built to 2022 regulations must be 20% more airtight than one built to the previous regs. In one hour, for every square metre of roof and wall surface area, you’re allowed to lose eight cubic metres of warmed air through leaks in the building fabric. For a new Passive House you’re only allowed to lose just over half a cubic metre, 0.6m3/(h·m2)@50Pa to be precise.
Part-L also now insists EVERY new house is tested instead of a handful of each archetype. Previously, a crafty developer could build 100 houses and only need to test 10 of them. Those 10 could be tested then fixed, tested then fixed, until they scraped through. Meaning 90% of the houses on the estate were untested and quite often left leaking like a sieve.
A 200m2 property with 2.4m ceilings (480m3) is currently allowed to lose around 3,840 cubic metres of warmed air every hour. Most of the time that air is warmed by burning fossil fuel, either directly as gas/oil, or indirectly by generating electricity. It sounds ridiculous because it is. If it were a Passive House, it would only be allowed to lose around 288 cubic metres of air
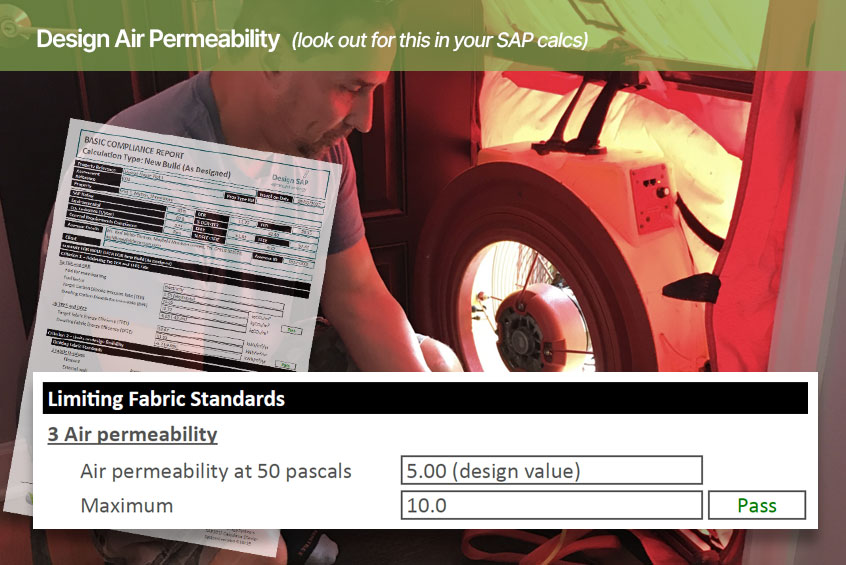
Ask anyone who really knows the energy calcs what they think of them, and they’ll probably tell you most are not fit for purpose. SAP calcs are inaccurate because they still penalise you for heat recovery*, EPC calcs are inaccurate because they’re based on SAP and they assume older houses still meet older regulations, and ‘MCS-compatible’ heat loss calcs don’t credit you for airtightness or heat recovery. For anything like accuracy, you need to use the Passive House Planning Package (PHPP).
PHPP is the most accurate energy modelling tool in the world. It factors in the property location, orientation, amount of shading, fabric u-values, glass, wind speed, heat recovery efficiency, and most importantly of all – airtightness.
To illustrate the airtightness cost benefit we can adjust the air permeability figure in the PHPP model keeping all other parameters the same. For example, here’s how airtightness reduces the annual heating demand in a 147m2 property over three floors..
The conclusion
If you pay a little more attention to detail during the build and manage to achieve air permeability of 3.0 instead of 10.0, according to the Passive House design tool you’ll reduce your heating costs by almost half, forever. The cost saving will be enormous over the long term. But if you want air permeability below 5.0 then you must install MVHR first, and MVHR needs to be designed very early in the project. Before you complete the construction drawings and submit the Building Control application ideally.
* Regarding SAP 10.2 – The BRE can’t test MVHR units with ducting greater than 150mm, i.e. units suitable for large properties. People normally end up with two systems when one bigger unit would suffice, saving money and energy (and carbon). SAP also encourages the use of branch ducting instead of the more efficient, lower pressure radial ducting. In our experience, SAP is responsible for many of the overheating issues we face because it encourages designers to specify heat-absorbing glass on the wrong elevations. It’s a limited compliance tool at best, it’s not a tool for designing a low energy properties.
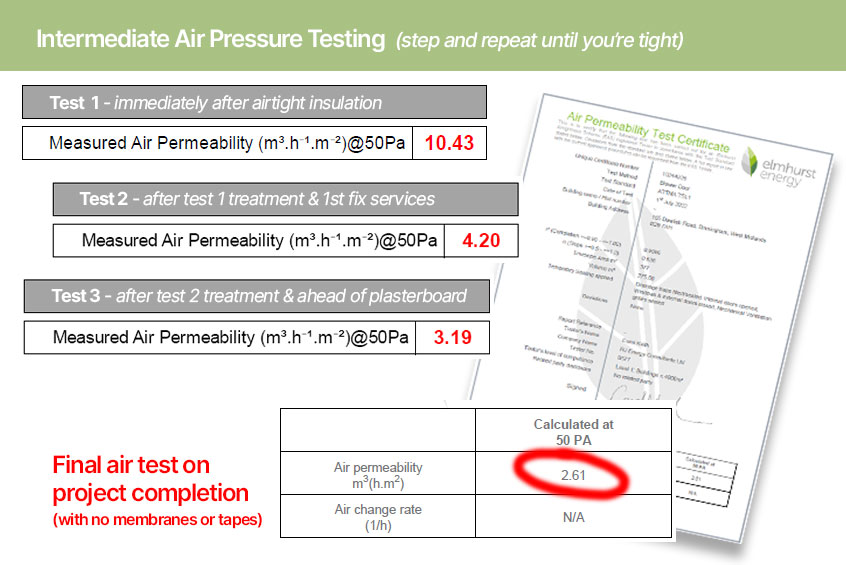
There are two ways to achieve airtightness. The traditional way involves Air/Vapour Control Layers (AVCL membranes) applied to the entire internal wall and roof surface area, then tapes, grommets, and sealant to keep it in place and plug the gaps, and then normally lots of air testing, fixing, testing, fixing. It works but can be painstaking and there are no guarantees.
New products and techniques make it much easier and certainly faster. Depending on the construction type and your target air permeability, the options now include airtight expanding foam insulation, spray-applied AVCL coatings, and to finish off, aerosolised acrylic sealant applied pre-plasterboard, also know as Aerobarrier. There is no single magic bullet, you normally need a combination of bullets to suit the job in hand.
One thing is for sure, achieving airtightness will give you a better return on investment than solar panel, heat pumps, or any other green tech. The prize is a 50% (or more) reduction in your heating costs forever. But if you want airtightness you need MVHR first, so that’s always the starting point. And MVHR planning needs to start much earlier than you think.